21 Best Golf Cart Troubleshooting and Maintenance Checklist Tips (All Models)
It takes some small amount of dedication to keep your golf cart running. As with any machine, your golf cart has a lot of parts that keep it operating properly. If any of them are failing, then the whole system can come crashing down. Whether you have a Yamaha, E-Z-GO, or Club Car golf cart, this checklist will keep you running smoothly and take care of most minor issues that will eventually arise. Hopefully, this checklist will allow you to save some time and money by keeping you out of the shop for easy, small fixes.
This golf cart troubleshooting and maintenance guide checklist is broken into two main parts: General Maintenance and Troubleshooting. General Maintenance applies to either electric or gas powered golf carts, and troubleshooting starts that way, but eventually is broken into two subcategories for electric or gas motors.
This is because gas and electric use very different systems for power, so troubleshooting electric golf carts is a little different from troubleshooting gas powered golf carts.
Here is a quick review of some of the tools you need on this list:

- LIFETIME Warranty and batteries included; Use for cars, trucks, motorcycles, bicycles etc
- DIFFERENT BY DESIGN
- QUICK PRECISE READING

- Checking Compression On Petrol Engine Quickly And Accurately
- Easy Pressure Release Button On Side Of Tester
- Completed Kit Comes With Adapters For Most Applications
- Kits Includes 2 Rubber Cones Ends Which Do Not Need To Thread Into Head
- 3" Gauge Features Dual Color Scale

- Fleet and Vehicle Maintenance
- Manufacturer: Crc
- Made in: United States
General
For general maintenance on your golf cart, we’re going to check the three most important safety features, brakes, tires, and lights, along with the most important powertrain component, the batteries. Whether you have a gas or electric golf cart, all four of these components are essential to the proper operation of your golf cart, so it’s extremely important to keep an eye on them if you want your golf cart to run smoothly.


of Callaway ERC Triple
Track Golf Balls for
yourself or your buddy!
Tires
Tires are the last part of your drivetrain, along with being the primary buffer between your golf cart and the ground. Keeping them properly inflated and replacing them when they get too bald is essential to your golf cart’s efficiency and safety. Check out some golf cart tires to replace those bald ones right here on Amazon.
Inflation
There are a lot of different recommendation for tire psi. At the end of the day, it all comes to trade off. Over inflating your tire will increase your efficiency by reducing tire drag, but will also lower your traction by not allowing as much of the tire to contact the ground at any given time.
An over inflated tire will also wear out in the middle a lot faster and drastically decrease your tire’s life. Under inflated tires will increase your traction, and provide a smoother ride by being softer and having more flex, but at the cost of efficiency.
Under-inflated tires will also decrease your tire’s life by wearing unevenly on the sides of the tread. Knowing the proper tire pressure for your golf cart helps. The image below is the one that I have used in the past.
- LIFETIME Warranty and batteries included; Use for cars, trucks, motorcycles, bicycles etc
- DIFFERENT BY DESIGN
- QUICK PRECISE READING
Your golf cart maintenance handbook should list the proper tire inflation level, but if not, the tire will normally have its pressure range listed on the side of the tire. Aim for the middle of that range. So a tire that lists 20-22 psi range would be ideal at 21 psi.
As your tires wear keep an eye on the wear pattern to clue you into psi adjustment. If there is more wear on the outside of the tread, you should increase your psi, and if the wear is mostly in the middle, decrease your psi.
Tread
While you’re keeping an eye on that tire wear, make sure to check that your tire is still safe to ride on and inflate. If the tread is getting dangerously low or bald, your stopping power will drastically decrease, meaning you will be at more danger of collision. After bald, you may start to see steel cords showing from beneath the rubber.
This means the tire is dangerously close to blowing. Replace this tire immediately and don’t inflate it unless you have to, as it could blow up. A blown tire can lead to severe injury from tire shrapnel, or a loss of control if it happens while driving.
Brakes
Brakes are another important safety feature. I think the reasons for that are pretty obvious, right? I mean what’s more important? The ability to move, or the ability to stop? To stop properly, though, you need brakes. Thankfully Amazon has most of the common ones listed here.
You should give your golf cart brake system a visual check every few months to ensure that everything is in order, along with addressing brake concerns such as squeaking or soft stops as quickly as possible after they arise.

Visual brake check
For your visual golf cart brake check, we’re going to check every single component of the system looking for any parts that need replacement or adjustment. We’ll start at the brake pedal, looking at the pivot points and return springs. The pivot points should move freely, and the return springs should stay lubricated, clean, and tight enough to return the pedal without being so tight the pedal is hard to depress.
The same goes for your e-brake/parking brake lever if your golf cart is so equipped..
The next part to check is the cable system. Make sure to check both ends of all cables where they connect to the system. This is the first place you’ll usually see fraying. Also look under the battery carriage where it’s possible battery corrosion and acid may have damaged the cable.
If you find any rub wear, frayed ends, or gashes, replace the cable immediately, if all is well, make sure each point and connection is well lubricated and has good tension.
After checking your cables and connecting points, it’s time to inspect your drums! Jack up the back of the golf cart, and remove the wheels. The brake drum is the big drummy looking part the wheel was attached to. Check all external components for damage, tightness, and good motion.
If anything looks out of place or even a little out of whack, either replace it, or have a mechanic look at it as soon as possible. It’s better to be safe than sorry. There are some ways to adjust the golf cart brakes as well.
Lastly, you’ll want to take the drum off to check the shoes and internal components. You may have to loosen the shoes using the adjustment wheel to do this. Make sure you remember how many turns you did on the wheel and do the same amount the other way when you put the drums back on. If you lose count or forget, it’s not a big deal, when you put the drum back on, just tighten until you feel resistance and then back off a turn or two.
With the drum off, take a look at the shoes, all of the bracket system parts, and the inside of the drum. The shoes should have at least a millimeter of material left, and an even wear pattern, and the drum should have an even wear pattern on the contact surface.
Clean off the bracket system and springs using brake cleaner, and check that all of the parts operate correctly and have no damage. Replace anything that looks bad, then put the drum and wheel back on, and you’re good. You might even want to consider upgrading your golf cart to disc brakes.
With a hydraulic brake system, make sure the brake fluid is within the recommended fill range and not leaking. Any old brake fluid should work, but I like to use Prestone or ACDelco. If there is any sort of contamination in the brake fluid, it’s very likely you have a leak somewhere and should have the system looked at by a professional.
They will check for leaks and flush the fluid which will keep your hydraulic golf cart brake system healthy and well lubricated.
Common golf cart brake concerns
Brake concerns are usually pretty easy to spot, and if you understand your golf cart brake system, equally easy to troubleshoot. The most common concerns are squeals, grinding, and hard/soft stops. For squeals, the problem is usually that the shoes or drum are too dirty or wet.
Take the drum off and thoroughly clean the whole area. If it squeals in the rain, that’s pretty normal, as wetness can cause the issue as well. For grinds, it’s most likely a parts issue in the drum. Either the shoes have worn to the point of metal contact, or a part has gone out of whack and is contacting the drum.
Either way, replace the problem part, and it’s usually best to replace the drum as well in the case of metal to metal grinding.
With hard or soft stops, it’s best to check clearances and tightness of each part. If your cable is too tight it will cause hard stops, and if it’s too loose, you’ll have soft stops.
WIth a hydraulic brake system, make sure you have fluid in the system and no leaks. The issue is probably as simple as a minor adjustment, but hard stops can als be a symptom of low shoe material, so check those if you can’t find any issues in the cable tightness or hydraulic system. If these concerns persist after you try to fix them, or for any other concerns, have a mechanic take a look.
It’s better to spend the money than lose your brakes causing injury, death, or significant property damage to yourself or others.
Batteries
Our previous article touched on everything you need to know about batteries, but as far as general maintenance goes, make sure your batteries are watered and corrosion free. Check the cables, terminals and posts for corrosion frequently by looking for the funky, fuzzy, blue-green stuff growing on any exposed metal.
Attack it immediately, baking soda or battery cleaner will do the trick. Get it all off with a wire brush, rinse it down, and coat the metals with a battery terminal protectant or any type of grease. I use this one, but honestly anyone would work:
[amazon box=”B000CIRTY0 “]
As far as watering your batteries, it really only matters on a wet-cell lead-acid type battery. Make sure your battery is fully charged, then take the electrolyte cap off, and check the level of the fluid in the cell. Fill it to the proper recommended level, and replace the cap.
Simple as that. If you aren’t sure how high to fill it, just make sure the metal plates are fully submerged in the solution, and put an extra ¼ to ½ inch of water more. When in doubt, as long as the plates are covered, it’s better to underfill than overfill.
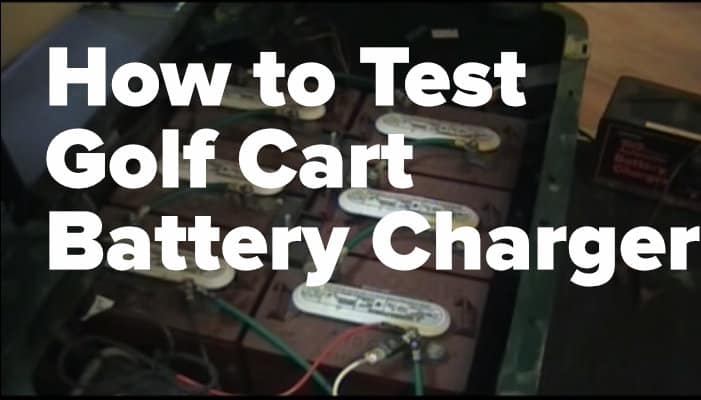
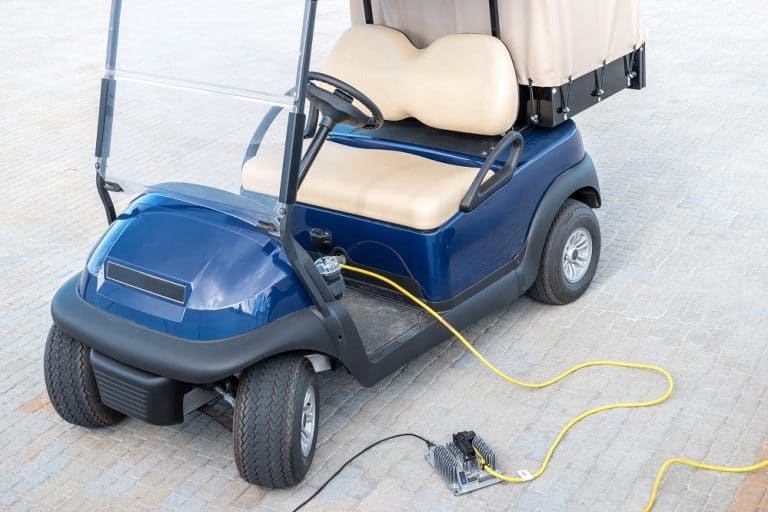
If you think your batteries are fine, but still having issues charging them, the double check your battery charger.

and apparel.
gear, accessories and apparel. (affiliate link)
Lights
If driving in a heavy overcast, at night, or any other low light situation, your golf cart lights are the only way for you to see anything while driving. On top of this, your lights are used to signal braking and intention to turn to other drivers. This keeps you and your golf cart, along with other drivers and pedestrians, safe.
It’s easiest to check lights with two people so one person can operate each light and the other person can check the lights as they’re supposed to come on.
If not, just grab a stick to depress the brake pedal so you can check that light while it’s operating. You can check reverse lights this way too, by putting the golf cart in reverse with the brake pedal depressed. This will keep the cart from moving, but turn on the reverse lights for you so you can check their operation.
If you find a light out, go ahead and remove the bulb and consider of getting a replacement. From here, there are a few different directions things can go.
- If the bulb is obviously burnt out, and the socket and connections look fine, go ahead and replace the bulb. This should fix whatever is wrong.
- If the bulb and socket all look fine, but it’s still not operating, go ahead and replace the bulb in case you can’t see its fault.
- If the new bulb works, all is well.
- If the new bulb doesn’t work, check the fuse and all connections.
- If the socket looks burnt or otherwise damaged, you should replace it as well as the bulb, as a damaged socket will cause undue wear to future bulbs.
- With a brake light, check the brake light switch, especially if your brake lights are staying on when you aren’t pressing the brakes.
- This switch is located near your pedal, with a small button that is typically depressed when the pedal is in “rest”position.
- When you depress the pedal, it allows the switch to turn on by releasing the button.
- You may need to simply adjust it, but if it has an obvious visual problem, replace it, and if you jump the switch, and that makes your brake lights work, then replace it.
Keep up with these general maintenance guidelines, and your golf cart will remain safe and efficient and use these to help you keep warm! The next section will go into what to do when things are not working.
Troubleshooting
For this section, we have a general no start troubleshooting, and a few subcategories for electric golf carts and gas powered golf carts. Again, this is because the two drive systems are quite different. Since the systems are so different, you end up with totally different golf cart troubleshooting checklists.
Now the first part of golf cart troubleshooting is to go through a general maintenance check on your batteries and connections and to make sure that everything is where it’s supposed to be. If your gear selector switch is supposed to be in neutral, make sure it is, make sure the power switch is on, etc. after that, things get a little more interesting. We’ll start with general golf cart troubleshooting since electric golf carts and gas golf carts have these parts in common.
Golf cart troubleshooting checklist
This checklist is designed to handle most minor no-start problems or an immobile issue.
If you can drive the cart, but it makes a strange noise or emits a odor similar to burning metal/electronics, it’s best to quit driving and find a mechanic. If your cart is just being sluggish or has a drastically decreased range, check out our article on golf cart battery maintenance.

Key switch, connections, and fuse
The first step in diagnosing a no-start issue is the key switch. Of course, you’ll have to check more than just the key switch in this step, but it’s all part of the same system. If you’re sure that all of the conditions are set to make the key switch work, but you’re still not getting any power, the key switch is your most likely culprit, and easiest to check.
-
Fuse first!
Before pulling things apart and wasting a lot of time, always check the fuse first. It’s almost always a fuse when performing electrical diagnosis. If the fuse is blown, replace it. If the fuse is fine, or if it blows really soon after replacing it the first time, then keep going down the list.
-
Connections and wires
Much cheaper than a switch itself, it’s pretty easy for the key switch’s mostly exposed connections to become corroded. If this is the case, just simply replace the wire that’s affected. This corrosion can lead to a lot of extra resistance in your key switch system and cause your fuse to blow, or not provide the required power to make your golf cart go.
-
Switch itself
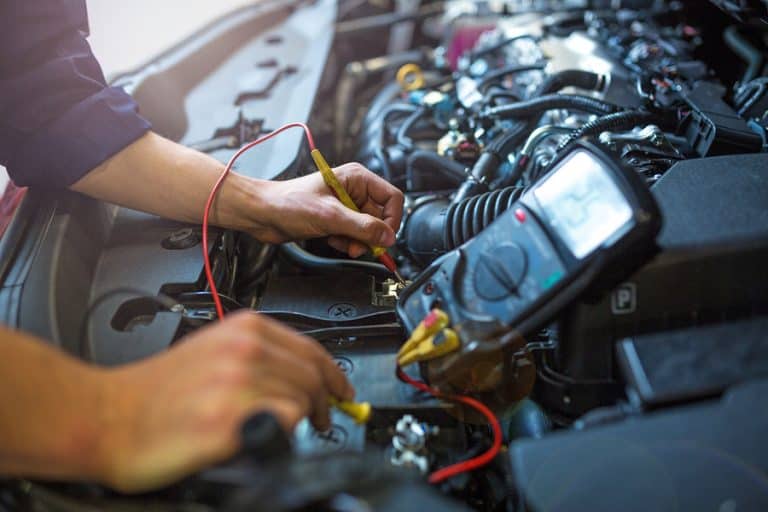
Lastly, if all else in the key switch circuit is working just fine, it’s time to test your key switch. You can either use a voltmeter or jump the switch. A voltmeter should read voltage on one wire constantly, and the other wire should only have voltage when the switch is turned on.
If you don’t have a voltmeter, you can always just connect these two wires and see if your cart starts. This is called hot-wiring. We wrote an article about it.
If the switch fails the test or if your cart works without the switch, then replace the switch as soon as you can. hot wiring your golf cart is bad for it.
Forward/Reverse Switch
The forward/reverse switch will show failure in one of three ways. No forward, but plenty of reverse, vice-versa, or absolutely no movement. This is a purely mechanical switch, so it’s pretty easy to test and fix. Find the switch itself, not just your selector on the dash. The switch should have two lugs that get contacted by a pin. Similar to a distributor in an older car.
Make sure your selector is actually moving the switch’s pin. If the switch is actuating but the switch is still not working, check for voltage at the power wire, and ground at the other two wires.
If there is no power at the power wire, then keep following the circuit back to the key switch. If there is no ground, then follow the circuit through until you find the accidental open. If you have power and ground, then make sure your connections are tight.
If all of these tests pass, but you still ain’t moving, then jump the switch. If you’re able to move now, then you know your switch has failed. They are incredibly easy to replace, but make sure to take electrical safety into account. Click here and see the best switches for your cart.
Solenoid

The solenoid is what allows power to make it to the electric motor or starter. There is a little rod inside that gets popped out when you press the accelerator. This rod creates contact with the motor circuit, allowing your golf cart to move. The solenoid will have four terminals, two big and two small. You’ll test the solenoid in
-
Click test
Before we start this test, find your solenoid and disconnect the cables from the two large terminals. Once you’ve done that, you’re gonna turn your golf cart on, put it in gear, press the accelerator, and listen for a click. This is that rod actuating and attempting to close the circuit. Make sure you have disconnected the cables from the big terminals first or your cart could take off while you’re listening, causing possible injury.
- No click
If you didn’t get a click, then check that the solenoid is receiving power with your voltmeter. Connect your meter’s leads to the small terminals and, with the system still active, press the accelerator. You should receive system voltage. If you read system voltage, but still no click, then your solenoid is defective and requires replacement.
If you do not receive voltage, then check the power side against ground on the golf cart, and the ground side against power on the golf cart. Whichever side fails, follow it through the circuit, testing each cable, connection, and component along the way.
- Solenoid clicks
If it does click, then check for resistance on the two large terminals while the solenoid is activated. Your solenoid should have an operable range, usually 0.1-0.4 ohms, if it falls outside of that range, then your solenoid has bad connections and needs to be replaced.
Electric throttle system troubleshooting

An electric golf cart will have a speed control system that involves an inductive throttle sensor and a speed controller. This system won’t be found on a gas golf cart obviously, and is very different from anything you’ll find on a gas powered golf cart. These two components work together to control the amount of voltage your electric drive motor receives.
The solenoid is crucial to your cart’s performance, so if it is acting up and a replacement is warranted, get the make and model of your cart and check out some prices on Amazon here.
Inductive throttle sensor
If your solenoid wasn’t clicking or receiving power, you may end up looking at your throttle sensor. Your accelerator works by pushing a rod through a coil thus changing the inductance of that coil.
This inductance creates a signal that will activate the solenoid, then tell the controller how much voltage the driver is wanting through the communication of the coil’s inductance. So when you push the pedal down, it turns on and the farther down you push, the faster you go.
We’ll test the throttle by checking for power at its output. You can probably find your throttle sensor’s range in your golf cart’s manual, asking a technician, or finding it online.
[amazon box=”B071Z775QX,B0744DXB1S,B0829XR1HN”]
We’re gonna start by attaching our voltmeter’s negative lead to a suitable ground like the golf cart frame or the negative battery terminal, and the positive lead to the output wire on the throttle.
With your pedal at rest, you should read zero volts. Slowly push the pedal down until the solenoid clicks (provided the solenoid is operable) and you should get a reading really close to one end of your throttle’s range.
Now slowly continue pushing the pedal down.
The voltage should either decrease or increase smoothly to the other end of your throttle sensor’s range, reaching very close to that end with the pedal all the way down to the floor.
If your throttle sensor is receiving power, but either never turns on, never changes voltage or goes out of range, it requires replacement. If the voltage is jumpy as you push the pedal the pedal down, you should probably replace it as well, since it is starting to fail and will probably give intermittent problems very soon.
Controller
So you checked everything else, but your electric golf cart is still a no go? Pretty much all you have left is the controller. The controller works in conjunction with the inductive throttle controller to control the amount of power your motor receives.
Basically, it’s your throttle for electric power instead of fuel/air. It works pretty simply, when the accelerator is pushed down, the solenoid clicks on, and the controller will receive pack voltage. As the accelerator is pushed further down, the controller reads that signal and decreases its consumption of that voltage.
This action controls the amount of power leaving the controller. Essentially, the more power your controller is using, the less your motor is getting and vice versa.
We’re going to test your electric golf cart speed controller by testing its output. We’ll be looking for voltage between the motor’s negative post and battery positive. As you press the pedal down slowly, the voltage should increase from zero when the solenoid clicks to pack voltage when the pedal is fully depressed.
If you’re not receiving any voltage, but everything else worked, then replace your controller. If the controller passes this test, and you have checked literally every other component, you may have a bad motor or a bad motor ground. Check the ground before replacing your motor.
This is done by simply repeating this test but by checking where the motor’s ground strap connects to the frame.
Gas throttle system troubleshooting
For gas motors, the throttle system is a lot more straightforward. The whole system is usually mechanical with only one electrical switch that closes the starter circuit, thus starting your motor.
Micro switch
The micro switch tells your starter circuit when you are ready to go by monitoring whether the gas pedal is at rest or has been depressed. This switch is installed very close to your gas pedal, and when you depress your pedal, it allows the starter circuit to close. The switch is very easy to test, simply uninstall it and check it for continuity. If it’s resistance is too high, or infinite, replace the switch.
You can also test the switch by jumping it and seeing if your golf cart starts. If it still doesn’t crank, and everything up until this point also tested fine, you should test your starter/generator and replace it.
Gas throttle
Your gas pedal should have one or two pivot points that allow you to pull on a cable. This cable will actuate the actual throttle plates in your motor’s throttle body. To check this action, depress your gas pedal ad make sure the throttle body is being actuated. If it isn’t you need to find where the cable has broken or become unattached.
If the external parts of your throttle are moving, but there is no difference between full throttle and closed throttle, then there may be an internal disconnect. Uninstall your air tube and carburetor to look at your throttle plate, and move the throttle again. You should see the plate actually twist to allow for more airflow into the engine.
General gas troubleshooting
If you have checked all the electrical components of your gas golf cart, but you still have a no start issue, it’s time to look at the motor itself. Gas motors work pretty simply. Your golf cart most likely has a twin cylinder, 4-stroke engine. This engine requires four things to run: fuel, air, spark, and compression.
There are a few mechanical parts that can mess up and get in the way of these four essential things. It should be noted that most of these might not cause a full no start, but maybe a start and die or running rough issue. All of these issues are for when your starter is causing the motor to crank, but it’s just not starting or running correctly.
Governor
The governor’s job is to restrict your golf cart’s throttle from allowing your golf cart to reach unsafe speeds. We did an article on making your golf cart go faster. Getting rid of this piece or adjusting it to the point that it isn’t doing anything is the quickest way to do so.
Sometimes, this piece will get out of adjustment and not allow your golf cart to throttle itself enough to stay running. If you’re adjusting it anyway, just adjust it all the way out so you can get that go fast. Unless you want it to be slow for safety reasons, of course.
Air delivery
The next easiest place to check for problems is the air filter box. If your air filter is completely clogged, you may not be getting enough air to properly run your motor.
Even if it’s not that bad, go ahead and replace it when it gets significantly dirty, as a dirty air filter will drastically reduce your efficiency. Once your air filter is under control, follow the air tube to the carburetor. Make sure that air is making it all the way there.
Fuel delivery
Now that you have confirmed air is making it to and through your carburetor, the next most likely issue is fuel. I truly hope you checked your gas level before getting this far. If not, you probably feel a little silly right now. First step for fuel delivery diagnosis is checking all the fuel lines.
They should all be relatively dry and should not smell like gasoline. If they are leaking even a little, replace them as they are a danger.
Once you have checked your fuel lines, the best way to ensure fuel delivery is to take your carburetor off the motor with the fuel lines still attached and activate your starter circuit. Your carburetor should spit a little fuel out. If it doesn’t, disconnect the fuel pump from the carburetor and activate the system again, the fuel pump should spit some fuel out.
If it doesn’t spit fuel, replace the pump with an appropriate one here, if it did, but fuel didn’t make it through your carburetor, then you probably have an issue with your carburetor fuel jets. Clean them out, reconnect your fuel pump and restart the test to confirm your repair.
Spark
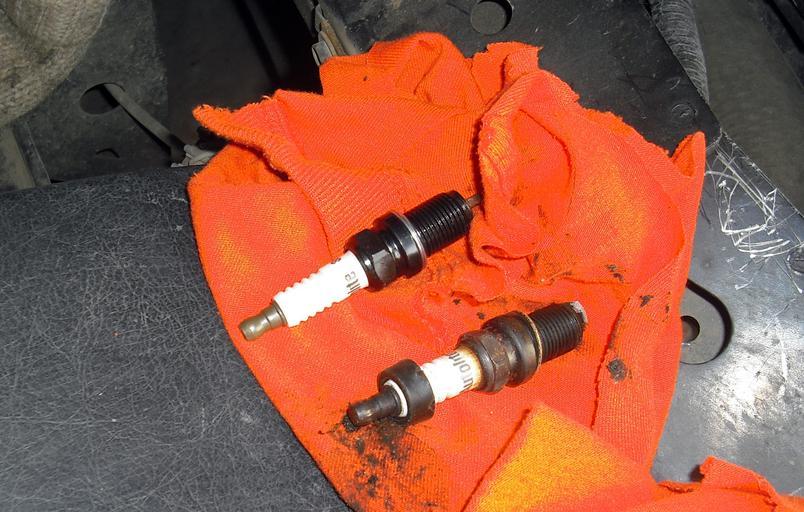
The last easy item, we need to make sure we have spark otherwise the fuel/air mixture is pretty useless. Make sure your spark plug wires are in good condition. If they are brittle, stiff, cracked, or if any insulation has been worn out, use replacements here. Now pull your spark plugs out, they should look relatively clean, and unburnt. If the electrode looks worn, or if the plug looks like it has burnt, replace the plugs. They will look a little like this:
Now connect the pulled plug to your plug wire and activate the starter circuit. You should be able to see the spark jumping the plug gap. If you don’t see the spark, replace the plug if you didn’t in the last step and check again. If you still see no spark, check the plug wires against their nominal resistance.
The nominal resistance should be marked on the side of the wire. If your plug wires are good, then go back to the distributor, pull the cap and check your pins and rotor. If they look burnt or if your cap is degraded, go ahead and replace the cap and rotor.
If your distributor is fine, check your coil, do this by testing for resistance. It should read a nominal amount of resistance, probably listed in your manual. It’s usually a range close to 3.7 to 5.2 ohms. If it falls outside of this range, replace it.
Compression
To check for compression, pull a spark plug, disable fuel delivery, and install a compression tester in the plug hole. Now activate your starter for about three cranks. Your compression tester will read a certain amount. Reset your tester and repeat the test a few times. Here is a popular one on Amazon if you don’t have one:
[amazon box=”B00SKSAB8U”]
Take an average and compare it to your golf cart’s compression specification. This can be found in your manual.
If your compression is significantly lower than your compression specification, then you may have a valve or piston issue. These are incredibly difficult to repair, but if you feel confident, you’ll save a lot of money doing it yourself over hiring a mechanic. If you mess up, though, you might be buying a whole new motor, so be cautious.
Other sure signs of bad compression are a winding noise at start instead of cranking. If your golf cart motor is attempting to start, but it’s just making a winding noise instead of a compression noise, then you have a valve chain problem. These are very hard to diagnose, but if you’re interested, make sure to get a repair manual for your motor.
If you have found compression to be the culprit, the only real way to diagnose it and repair it is to pull your motor and start digging down. First, remove the valve cover. Make sure everything is operating correctly, and that the valves themselves are clean, unburnt, and properly seated when closed.
If any parts in the valve chain have up and down play, they require replacement, as they may be robbing you of compression. If the valves are not seating properly or you can’t find a problem this high up, you need to pull the head.
Once you have the head off, the first thing to look at is the head gasket and head gasket faces. You can see if the gasket is blown pretty easily, there should be a pretty distinct line along the gasket face surface, and if this line has a break, then the head gasket is most likely blown.
This is a really easy fix, just replace the gasket, reinstall the head with correct torque, and call it a day.
The next thing to check is the valve head itself. Make sure it’s nice and clean and that the valves are seating correctly. Either way, give it a clean since you have it off. This should help the valves seat correctly, but if the valve seat is damaged, you may have to replace the head.
Since you have the head off anyway, may as well check the piston face and cylinders. If there is any scoring, this could be your problem. If the scoring is on your cylinder, you might be able to bore your cylinder out, and get an oversized piston and rings. This is a little expensive, but you’ll essentially have a hot-rod golf cart, and that’s pretty cool.
If you still haven’t found the problem, go ahead and pull the cylinder off. Heck, do it anyway. You made it this far, right? Pull your piston out of the cylinder and check your piston’s rings. These allow the piston to create compression without direct contact to the cylinder.
If it’s worn out or missing, go ahead and replace them. At this point, you’ve pretty much done a top end rebuild.
Why not rebuild the bottom end too, right?
Conclusion
That is pretty much everything I could think of for tuning up your cart for the season.
If you are anything like me, you don’t mind tweaking here or there, but even then, there are some things I’d rather just leave to a professional.
So be wise in what you mess with and what you don’t. I’d hate for you to replace an entire part or housing just because of inexperience.
After you are ready to go with your cart, check out the best speedometers so you can know how fast you are going.